Alignments and Styles
Each code block or ad can be aligned according to your needs. Ad alignment is necessary in order to properly position ads so that they complement the content and adapt to the theme layout..
Normally, the code block is wrapped with a div with appropriate CSS style. Of course, you can customize or define your own CSS code for the wrapping div. The following alignments are available:
- Default (simple
divwith thin margin around the block) - Align Left
- Align Right
- Center
- Float Left (ad on left with wrapped text on the right)
- Float Right (ad on right with wrapped text on the left)
- No Wrapping (inserts the code as it is, otherwise it is wrapped by a div)
- Custom CSS (You can define custom CSS code for the wrapping div)
- PRO Sticky ads (ad doesn’t move when the page is scrolled)
- PRO Sticky animations (slide, fade, flip, turn, zoom)
- PRO Animation triggers (page scrolled in % or px, HTML element becomes visible)
- PRO Close button
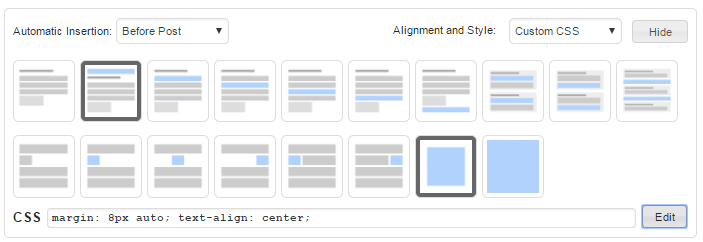
Click on the button on the right to see the graphical representation of the automatic insertion options and alignment styles.
![]()
Below the icons you can see the CSS code for the block alignment. Click on the code or on Edit button to edit the code. When you edit the CSS code the style automatically changes to Custom CSS.
You can also test different alignments and styles – click Preview button below the code editor to open preview window where you can check different alignments and CSS styles.
![]()
Wrapping code
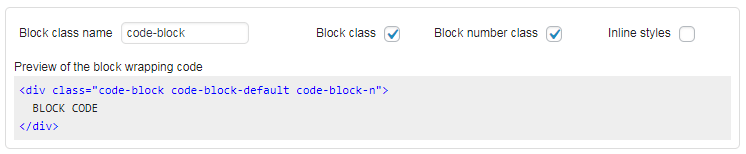
Each code (ad) block is automatically wrapped by the pugin in a div element. For example, the default wrapping code for block 1 looks like this:
<div class="code-block code-block-1" style="margin: 8px 0; clear: both;">
   AD_CODE
</div>
The wrapping code contains the CSS style for a thin margin around the code block (and optionally alignment) and Ad Inserter code block classes. It is not necessary to manually type a wrapping div in manually, with the default settings.
However, to disable the automatic wrapping, you can select the No wrapping style option. You can then manually add your own div element, or change or add your own CSS code using Custom CSS style (to edit the CSS code simply click Show button to reveal the code and then click on the CSS code).
You can also apply the same style to all the code blocks using Ad Inserter CSS class (default class name is code-block) and CSS code in the CSS file of your theme (for example style.css). Default class name, classes and inline style options can be changed in Ad Inserter plugin settings (Tab ⚙ / tab General). You can also leave empty Block class name and no classes will be added the wrapping div.
Default, Left, Center and Right alignment styles contain also CSS code clear: both; which clears any floating elements above.
Default Alignment
Default alignment simply wraps the code with a div with thin margin around the block. The block will be aligned according to the settings of the page. You should use default alignment unless you need to force specific alignment or wrap the ad with page text.

Left Alignment
Left alignment wraps the code with a div with thin margin around the ad block and forces the ad to align left. This means that it aligns the ad along the left side of the page or containing element. You can also test and modify the code in the Preview window.
In the preview window you can also use alternative CSS code for left alignment. Double-click on the icon for left alignment and the code will toggle. The current code version is displayed next to Alignment and Style selection.

Right Alignment
Right alignment wraps the code with a div with thin margin around the ad block and forces the ad to align right. This means that it aligns the ad along the right side of the page or containing element. You can also test and modify the code in Preview window.
In the preview window you can also use alternative CSS code for right alignment. Double-click on the icon for right alignment and the code will toggle. The current code version is displayed next to Alignment and Style selection.

Center Alignment
Center alignment wraps the code with a div with thin margin around the ad block and centers the ad between left and right page margins. This means that it aligns the ad to be equally spaced from the left and the right side of the page or containing element. You can also test and modify the code in Preview window.
In the preview window you can also use alternative CSS code for centering the ad. Double-click on the icon for center alignment and the code will toggle. The current code version is displayed next to Alignment and Style selection.

Float Left
Alignment Float Left wraps the code with a div with thin margin around the ad block and allows the text to continue right of the ad. This means that it wraps the ad on the right side with text. You can also test and modify the code in Preview window. Example with a banner set to Float Left:

Ad Inserter is a simple yet powerful WordPress ad management plugin with many advanced advertising features to insert ads at optimal positions. It supports all kinds of ads including Google AdSense ads, Media.net ads and banners.
Ad Inserter is more than just an advanced ad manager or plugin for ads. It provides many flexible options to insert opt-in forms, header scripts, AMP ads, Javascript, CSS, HTML, PHP, analytics or tracking code anywhere on the page.
If you are using responsive ad code (for example, responsive AdSense ads) and you would like to use floating alignment (ads wrapped with text) or sticky ads (only ads that stay fixed when the page scrolls, not sticky widgets) then you need to define ad block size or choose fixed size ad. You can do this by specifying ad width and height (for AdSense you can use built in code generator) or define ad block width and height using custom CSS (for example, by adding CSS code width: 160px; height: 600px;).
Float Right
Alignment Float Right wraps the code with a div with thin margin around the ad block and allows the text to continue left of the ad. This means that it wraps the ad on the left side with text. You can also test and modify the code in Preview window. Example with a banner set to Float Right:

Ad Inserter is a simple yet powerful WordPress ad management plugin with many advanced advertising features to insert ads at optimal positions. It supports all kinds of ads including Google AdSense ads, Media.net ads and banners.
Ad Inserter is more than just an advanced ad manager or plugin for ads. It provides many flexible options to insert opt-in forms, header scripts, AMP ads, Javascript, CSS, HTML, PHP, analytics or tracking code anywhere on the page.
If you are using responsive ad code (for example, responsive AdSense ads) and you would like to use floating alignment (ads wrapped with text) or sticky ads (only ads that stay fixed when the page scrolls, not sticky widgets) then you need to define ad block size or choose fixed size ad. You can do this by specifying ad width and height (for AdSense you can use built in code generator) or define ad block width and height using custom CSS (for example, by adding CSS code width: 160px; height: 600px;).
No Wrapping
No Wrapping style does not wrap the code with a div – it inserts the code as it is. The alignment will depend on the page settings. Use No Wrapping style only when you really don’t want to add the wrapping div (for example on AMP pages or in the <head> section or when you are inserting a table element).
Please note that many client-side functions like tracking, client-side device detection, client-side GEO targeting can’t work without a wrapping div.
Custom CSS
Sometimes the predefined CSS styles need to be modified in order to match ad styles with the theme. You can start with any predefined style and modify it or add any CSS code. To edit CSS code click on the Show button to reveal the CSS code.

Click on the code for editing.
You can also visually edit CSS code and watch it real-time how the ad will look like. Save the settings and click on the Preview button below code editor to open the preview window.
![]()
Example of a banner with custom CSS (red border):
margin: 8px 0; clear: both; border: 2px solid red; border-radius: 5px; padding: 5px;
Below the settings on the preview window there is a preview of the block code displayed between two dummy paragraphs. Here you can test various block alignments, visually edit margin and padding values of the wrapping div or write CSS code directly and watch live preview. Highlight button highlights background, wrapping div margin and code area, while Reset button restores all the values to those of the current block. You can resize the window (and refresh the page to reload ads) to check display with different screen widths. Once you are satisfied with the alignment and style click on the Use button and the settings will be copied to the active block where you can save them.
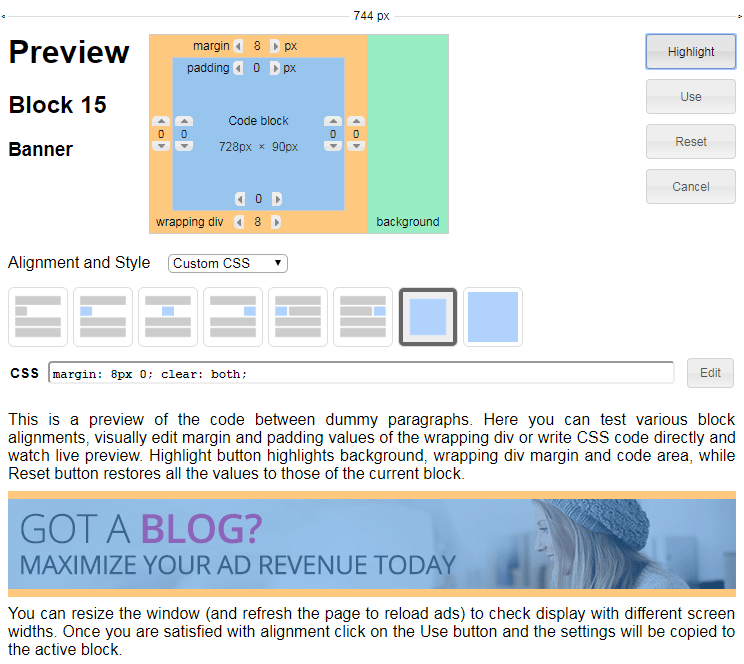
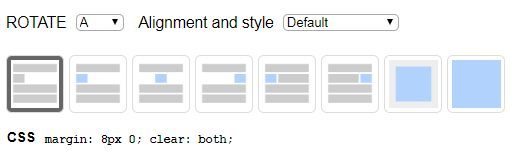
When the code contains shortcode separators (CHECK, COUNT or ROTATE) you’ll see additional selections before Alignment selection to select the code for preview.
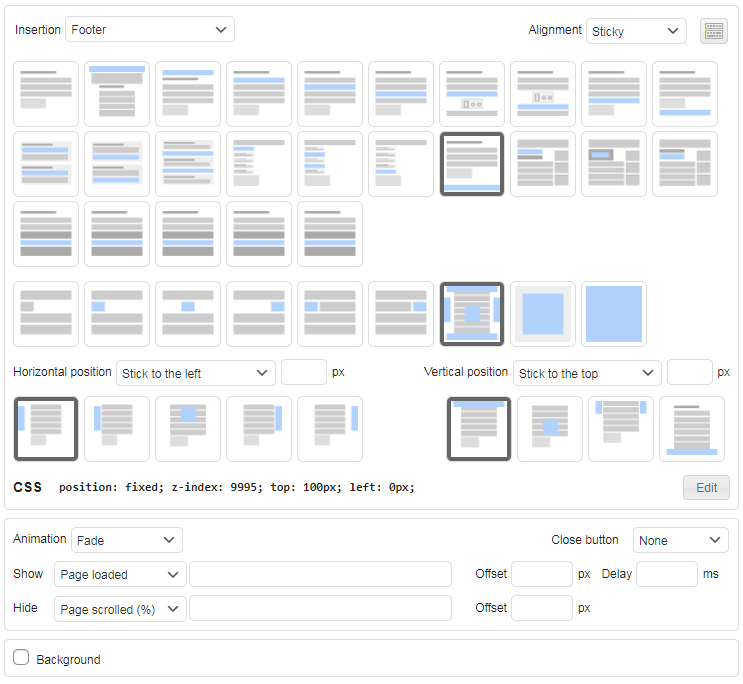
PRO Sticky Ads
Ad Inserter Pro supports also various types of sticky ads – ads that stick to the screen or content and stay fixed when the page is scrolled. It is also possible to configure “sidebar” ads that scroll with the content. There are also additional options like close button, delayed display and animations.
If you are using responsive ad code (e.g. responsive AdSense code) you need to define ad width (and height) otherwise the code can’t resize as parent container width for sticky ads is not known. You can do this by specifying ad width and height (for AdSense you can use built in code generator) or define ad block width and height using custom CSS (for example, by adding CSS code width: 160px; height: 600px;).
Sticky ads can’t be used on AMP pages as they use also Javascript code whcich is not allowed on AMP pages.
Please note that Ad Inserter supports another type of sticky ad: sticky (fixed) widgets. Sticky widget is a widget that you place in the sidebar and when the page is scrolled down and sticky widget reaches top of the page, sticky widget and all the widgets below stay fixed – they don’t move when the page is scrolled down. Sticky widgets are available also in the free Ad Inserter and are not considered sticky ads as described on this page.
To configure sticky ad select Sticky as Alignment. This will open settings for sticky ads – check Sticky ads page for details.
Related Pages
Install Ad Inserter for free
Ad Inserter Pro Affiliate Program
